I hear ya: "Sure, when I get my monome working I'll become a world famous musician with groupies all around the world and enough cash-money to shake a large stick at - but when will I ever get to do the bad-ass cool sh!t like testing my PCB board???" Right now!! "AWESOME!"
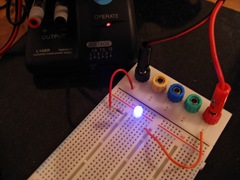
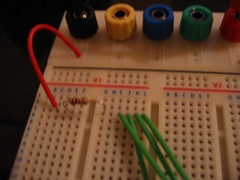
To test that the LEDs are all ok, I made a really simple light circuit. I have 3 volts going through a resistor (50 Ohms (green black black) at least if using 3 volts - I used 1k Ohms (brown black red) so the LED brightness wouldn't mess up the pictures), then the positive wire (on the right) connects to one of the other LED legs & you get red, green or blue.
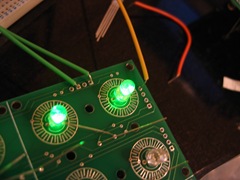
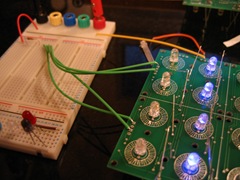
To test the board that was just soldered, just bring the negative line (the line that the LED cathode was in) to the LED grounds on the PCB board. These are marked LED-GND1 through to LED-GND4 on the underside - I didn't have to solder these in place, they worked ok for me just held there.
Now bring the positive line to the contact marked RED1 and row 1 should all light up red! Keep testing for the other colours and on the other rows too.
Any rows or LEDs not lighting up? Make sure the cathode is in the right place and the solder joints are making decent contact.
Next you can test the diodes & switches. There are tiny little holes you can do this test from but I found it easier when I snipped all the diode legs, put the button pad on and put the board upside-down.
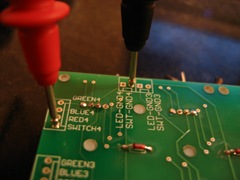
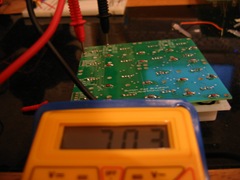
Using your multimeter set to 2000 Ohms resistance (or the diode tester if you have a model with the diode symbol on it (looks like ->| an arrow against a line)), connect red to SWITCH4 and black to SWT-GND4. You should initially get a 1 readout (meaning no current is getting through). If you push down (so the button is being pressed) the readout should change (mine went to 700ish) meaning when the button makes contact current passed through.
Repeat this for all the other buttons by moving the red to SWITCH3 and testing the button second down from the left and so on. When you get to the bottom, move the black to the next ground SWT-GND3 and move the red back up to SWITCH4.
Is the whole thing broken? Does nothing work? About to throw it all away and set fire to my blog? WAIT!!! All is not lost, you've made your first instrument, the pluckome, possibly inspired by this rainbow episode. Just pluck on any legs you haven't clipped yet - now go and impress your friends!!
No comments:
Post a Comment