Monday, November 3, 2008

Enclosure

That title sounds like some sort of crappy summer blockbuster action movie... starring Steven Segal as an ex-FBI agent turned Arduinome-maker??

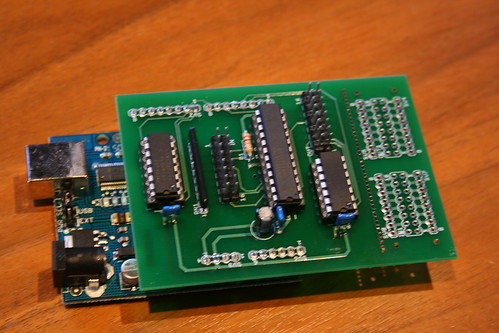
Anyway, I needed to make some sort of enclosure for my Arduinome. The manky tea-towel you've seen my Arduinome resting on wasn't really going to cut it as a long term solution. I'm heading off travelling for a couple of months and I wanted to loan my Arduinome to a friend while I'm away so when I come back she can teach me how to use it :) So, I had to get it ready before I go - hence why the rest of my work is so rushed and looks like a drunk 5-yr old did it.... ok ok, drunk AND angry.

Initially I wanted to make an enclosure for it out of Lego & call the end result a Legome.  Lego have part of their site where you can order individual bricks - it's pretty expensive but I thought it would be perfect... until I saw the 22-business-day delivery time - so that was out the window.

Next on the list was MachineCollective's site - he makes kits for Arduinome enclosures - perfect!! Except he's having trouble with his suppliers so isn't currently taking orders :(

My next desperate attempt at getting an enclosure was to get a friend who does that sort of stuff for a living to make up a design file and get it prototyped. It was going to be really expensive but I thought at least it would look really cool. Unfortunately it turned out to be too big for their prototyping process.

So, my last ditch desperate attempt at getting an enclosure was to rely on myself and my skills to make one... bad.... BAD idea....

I got a 45° router bit, my dad's old router, some MDF, a workbench and some clamps and got started.  I wanted to make a seamless box (nice ambition for a first attempt eh?) so I cut out pieces for the sides and the top with 45° joins:

IMG_0169  IMG_0172

But I didn't have any 90° clamps so I couldn't join any of it together.  I decided to give the faceplate a try. I cut out one hole as a template.  The plan was to do a full row and just use a router to get nice and even holes using the template.  So I drilled out one, cleaned it up a bit and started the face:

 IMG_0175 IMG_0177IMG_0178IMG_0179

Somehow even using a template every hole came out different & I was really out of time because I had to clean this mess up:

IMG_0173

Oh well, Lilly will just have to use the patent-pending tea-towel enclosure until MachineCollective starts taking orders again.

Because my Legome dream is dead, I think it's much more appropriate to rename it to Ghettome.

Friday, October 31, 2008

Can't get mlr working...

Hey, I can't seem to get mlr working with my Arduinome & I don't know what I'm doing wrong.  I'm following all the readme's and instructions but it never seems to kick off and respond to me hitting the 2nd button down (I tried all the buttons just in case).

I followed the instructions from http://wiki.monome.org/view/InstallationXp to install (I've got quicktime installed too).

Here's what Arduinome Serial looks like (I had to type "mlr" manually into the Address Prefix Pattern - I couldn't find any /sys/prefix button on mlr like on the simpler newer apps):

mlr_arduinomeserial

And here's what mlr looks like (dac is up, volume is up, wavs are loaded, tap is blinking):

mlr_blank

It should - according to the docs - kick off when I press the leftmost button on the second row down on the monome - but no joy, nothing happens, nothing lights up and I can't hear anything.

Max does say "can't find plug-in, using default" in the main window whatever that means?  Also the docs say "max/msp must have the OSC objects installed" so I should find out what they are...

Anyone have the same problem?  I'm guessing it's got something to do with it being an Arduinome and not a monome - maybe the device id should be m40h-001 instead of a40h-001 for mlr to work???  Anyone any ideas? Please help!!

I've got a post on the forum here so hopefully I can get started soon :)

Update: thanks to guys on the forum (soundcyst & edison) I got mlr and 64beat working - I had to put "/box" into the prefix address on ArduinomeSerial.  Version 2.27 of mlr has a /sys/prefix button though, it can be found here. These apps are great fun to play with!

Wednesday, October 29, 2008

Daedelus gig was awesome!

The Daedelus gig in Limerick was brilliant - that guy is amazing!  I brought a few friends along who hadn't heard his stuff before and they really enjoyed it.  I wish I had a picture of it here to show ye...

I got a chance to chat with Daedelus (Alfred) for a bit too and told him all about my Arduinome.  Somehow (a few drinks perhaps) I ended up challenging him to a battle next time he comes to Ireland.  Also, somehow (also a few more drinks perhaps) I told him how badly he was going to lose and he would cry all the way back to LA using his sideburns to dry his eyes :D

Somehow (too many drinks) he burned me for being a David Hasselhoff fan - I'm not!! How did that happen?!? Ah it was all in good craic.

So I'd better get started training up for this battle...  I need to have the skills to pay the bills (there are a lot after this project)...  I think mlr is the main app for mixing and I've tried to get it running a few times but no joy.  Unlike the simpler test apps, mlr doesn't seem to have any /sys/prefix button so I tried setting the Address Prefix Path to "/mlr" manually, no joy.  I'll post to the forums and hopefully someone out there knows what the deal is.

ArduinomeSerialMlr

To pretty up the post, here's a picture or 2 of maxlife in action:

IMG_0144 IMG_0148

Mirrored

All the bad things I was saying about why you shouldn't follow my wiring show up here, basically my Arduinome ended up mirrored - nerdscroll showed this up best (that's supposed to be a J):

IMG_0140

To remedy I decided to flip the connector on the Arduinome shield as this would save me loads of rewiring on the SparkFun boards.  Bad, BAD idea.  Nope I hadn't been abusing the solder fumes lately... Here's how taking the pin headers out resulted:

IMG_0127

Here's how cleaning the holes out resulted:

IMG_0128

So I had to wire up a new shield, what a waste - I really should have just done the rewire on the SparkFun boards.  Now my set up is nothing as neat as it was before:

IMG_0135 IMG_0134

Under-side of Arduinome shield:IMG_0136 

What a mess... at least it's not mirrored any more:

IMG_0138

If there is anyone reading these out there I hope they realise (as I just have) that how-to's written by total amateurs (me) shouldn't be followed! :) you have been warned!

Max/MSP Patches

Apparently you can use all sorts of apps to communicate with your Arduinome - like ChucK or Processing but I'm going to stick to Max/MSP for now, it seems to be the most commonly used.

Plug in your Arduinome, fire up ArduinomeSerial and get Max Runtime going.  Click File->Open in Max Runtime and open the monome_test.mxb that you downloaded earlier (in the last post).  You should see something like this:

monome_test

Click the "/sys/prefix /test" button (highlighted in red on top above) - this seems to set up the Arduinome to work with this patch - Arduinome Serial should show "/test" in the Address Pattern Prefix.  Now when you press buttons you should see them light up.  If you select toggle in the pairing (also in red above) - you can now draw by pressing buttons on your Arduinome!! Here's a space invader I did:

IMG_0142

I did some other images too - when I tried to do a self-portrait I just couldn't get my ear right.  It was maddeningly frustrating.  Instead of doing a Van Gogh on it and cutting off my ear, I've ordered another set of Sparkfun buttons and will attach them to the side of my head when they arrive.

Some other patches I found that worked so far were:

  • monome_midi_press_64 - play some piano
  • monome_midi_64 - more piano
  • skr - really sounds like Daphne Oram
  • maxlife - Conway's Game of Life
  • nerdscroll - scroll text (IN CAPS) across monome

Generally they all work by clicking a /sys/prefix button first.

Nerdscroll highlighted a problem for me that would cause me to muck up everything...

Hooked up

For a bit of stability, I got a few cable ties and some hot glue and stuck my 4 boards together - I'm probably going to regret it later when I try to screw it to an enclosure of some sort - so stay tuned for more disappointment!!

IMG_0097

The next stage I did was to add the DIL sockets - note that I don't recommend this way - go with someone else's directions - I'm just telling it how it is yo.

IMG_0098 IMG_0100

Now it looks all neat (these are the pre-fix photos):

IMG_0101 IMG_0105

To hook it all up to your computer you need the following at a minimum (mostly gotten from Julien's site):

... uhh I'll edit this if I'm forgetting anything ... download the right ones for your O/S (I'm on Vista - not my choice!!!) and unzip/install all of the above.

With your Arduinome plugged into the USB, run the Arduino programming environment.  Load up the Arduinome Firmware you downloaded earlier and and upload this to the board (icon in red on top).  It might complain that it's not the right port - usually it's the last COMXX port but try the others until the upload works.

ArduinoEnviroment

Run MProg. Click Device->Scan.  If your Arduinome is hooked up ok, you should see:

Number Of Blank Devices = 0  
Number Of Programmed Devices = 1

in the status window (if not plug the USB out & in, wait a while then try again).  Click on Tools->Read and Parse, check the "Use Fixed Serial Number" and enter something like "a40h-001" (you could change the number on the right if you wished).  Click File-Save As... then click on the flash icon.  If it goes well, you should see "Programmed Serial Number..." in the status window.


MProg


Close MProg, and reconnect your Arduinome.  Run ArduinomeSerial and it should detect your Aruinome:


ArduinomeSerial


At some point lights flash across the board - cool it works!!!


IMG_0108


I was ecstatic when I saw the lights go up (not too happy about the red line because I thought I only hooked up blue) but couldn't play with it as Daedelus happened to be playing later (in the Trinity Rooms Limerick of all places) so I had to go see him play!  Later!

Wired - a better way

Part of my decision to take a shortcut was based on an observation with the ribbon cable - if I used ribbon cable I could connect the DIL socket directly to the Arduinome shield and dodge having to do these solders & connections on the breakout board:

IMG_0070

However, using the IDE cable turned out to be a lot of work.  I learned about something called the pitch of cable. When I read it first I thought the pitch was the angle it made with the PCB, but I've since found out that it's the spacing between wires on a cable. The IDE cable has 1.27mm pitch so I had to split the individual wires on the cable to fit the holes on the PCB.  A better option would be to use 2.5mm pitch wire, that comes pre-stripped and everything!  You can find examples of these here at RapidOnline (UK).

Once you wire up the boards in the same way as I did previously (or follow Nomeist's diagram - it's clearer), wire them up to the breakout board following Nomeist's diagram because the order they go in is important.  Because I directly connected the DIL sockets to the cable I couldn't change the ordering of the wires & my monome ended up reversed (more on that later).  I *think* it would be possible to change the PCB shield to allow the reversal and make it simpler.

Then solder in a couple of DIL sockets (or pin-headers like I did - thanks to my local Maplin out of stock) to the breakout and hook up with a standard IDE/DIL cable to the main shield.

Next - plugging it in!!

Wired - how not to do it

The initial wiring to breadboard I did with the solid core before I got my shield looked so messy & would break easily if it moved too much.  Instead I decided to get some IDE ribbon just like the kind you might find in your housemate's desktop computer when he's not looking.

This title is called "how not to do it" because I'm in a rush and made some shortcuts which caused a big mess.  In the next blog I'll write about a better way.

It took a couple of goes to get the stripping (taking the plastic off the end) right, the first few do-them-all-at-once attempts failed miserably:

IMG_0076

What I found worked well, was to make a small cut at the end of the cable for however many wires you need (usually 4), then pull this apart from the rest of the cable (cutting all the way I often missed and cut into the wire).  Then I scored 1 cm from the end lightly, bent it back, then scored the other side - try not to cut into the wire itself.  I found my teeth were the best wire-strippers once the initial cut was made - try not to actually eat the wire.

IMG_0080 IMG_0082

Next 'tin' the strands from each wire.  Twist the strands of each individual wire so they are tight, then apply a small bit of solder with the iron along the twisted strands.  This makes it much easier to solder to the PCB later and stop strands from touching the other wires.

IMG_0085

Nomeist has a good diagram on how the wires should be soldered to the boards.  I think if I were to do this project over again, I would look into getting a proper 8x8 board with all these wirings already done on the PCB - it's a really fiddly job.  Meeker is in the process of making one (but for single colour non-RGB LEDs).  I thought initially I'll end up with an RGB Arduinome, but retrospectively the single colour one would have been perfect for my needs.

You can see how I wired up the boards from the next few diagrams.  I thought I was doing ok and would save on wiring & connectors (my local Maplin only had 2 DIL 16 connectors & messed up my reorder).  It turned out my monome ended up mirrored & it was a lot of work to get it back again.

IMG_0086 IMG_0087IMG_0089IMG_0092

You can learn from another one of my mistakes now - (if only I learned from my own mistakes):

IMG_0095

When you solder the wire to the PCB you should solder the other side (the side shown in the picture above). I don't know why I decided to solder the same side as the wire was on - perhaps my own stupidity, perhaps added stupidity from inhaling a load of burning wire plastic, at any rate it took a lot of stupidity.

Next is how I would imagine someone with some brains would do this...  First though, I've to help my housemate with his computer - it won't boot for some strange reason..........

Shields up!

... what a dorky blog title - sorry! :)

I'm writing all this from the future (no still no hoverboards), I got my shield last week and did a load of work on it but haven't blogged about anything since so this is written in retrospect.  Anyways, I got my shield:

IMG_0045

And started to solder it all up with my new temperature controlled soldering iron.  It was so worth it to get, I just dial in the temperature I want and don't have to worry about it overheating anymore.  Because I can solder and solder without having to take a break for the iron to cool down, the only worry left is having too much fun hallucinating from the solder fumes.  First I put on the chip seats (with the dimple in the right place).

IMG_0051 IMG_0052

Then the pin headers:

IMG_0055

Then the resistor network... shit, it's the wrong size so I just made like a undertaker and cut the leg off so it fits.

IMG_0056 IMG_0059

Next I put in the 22k resistor (didn't have a 20k) and the capacitors.  For mine the cathode (or negative) was the leg with a dot printed above it on the capacitor.  The bigger capacitor had a minus sign and a shorter leg to indicate the cathode.

IMG_0060

This was all made really really simple with the temperature controlled soldering iron.  Now it fits neatly on the Arduino:

IMG_0067

I'm dreading the next stage, wiring up...

Saturday, October 11, 2008

Bits missing

I had a go at wiring it all up according to Julien Bayle's schematic here, but quickly found out there were a couple of parts missing from his shopping list - like the RN1 in the top left whatever that is.  Also it was going to become really messy really quickly (this is just one board wired up):

IMG_1431

I did a bit of googling around around and found a few people (nomeist, dovemouse, bricktable) had gotten an Arduinome shield made up (sometimes called an unsped shield).  It's another PCB that sits neatly on top of the Arduino and sets it up to act more like a monome using the same components as Julien Bayle (I guess).  I think it's kinda cool that the monome people (Brian Crabtree and Kelli Cain) let people discuss a clone on their site, they've got a topic in the documentation with some handy links.  Here's a pic of the shield in place from someone who's also using the kitchen table as a worktop:

On the monome forums I found out that I had just missed a group buy (it's much less expensive per PCB if they manufacture more of them).  I've asked if there's anyone interested in another group buy, so will have to wait and see what happens... dovemouse's blog has a good parts list (UK based).

IMG_1433