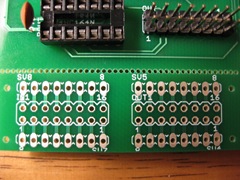
Part of my decision to take a shortcut was based on an observation with the ribbon cable - if I used ribbon cable I could connect the DIL socket directly to the Arduinome shield and dodge having to do these solders & connections on the breakout board:
However, using the IDE cable turned out to be a lot of work. I learned about something called the pitch of cable. When I read it first I thought the pitch was the angle it made with the PCB, but I've since found out that it's the spacing between wires on a cable. The IDE cable has 1.27mm pitch so I had to split the individual wires on the cable to fit the holes on the PCB. A better option would be to use 2.5mm pitch wire, that comes pre-stripped and everything! You can find examples of these here at RapidOnline (UK).
Once you wire up the boards in the same way as I did previously (or follow Nomeist's diagram - it's clearer), wire them up to the breakout board following Nomeist's diagram because the order they go in is important. Because I directly connected the DIL sockets to the cable I couldn't change the ordering of the wires & my monome ended up reversed (more on that later). I *think* it would be possible to change the PCB shield to allow the reversal and make it simpler.
Then solder in a couple of DIL sockets (or pin-headers like I did - thanks to my local Maplin out of stock) to the breakout and hook up with a standard IDE/DIL cable to the main shield.
Next - plugging it in!!

No comments:
Post a Comment