This might seem over-the-top basic to a lot of electronics-able people out there but it took a little working out for me because I'm an eejit so just in case it's helpful to others, here's the solder job.
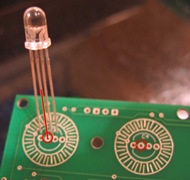
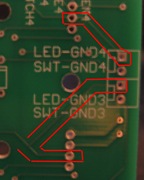
I usually like to dry fit everything first then do the soldering in one go. There's a few ways the RGB LED can go into the PCB, the right way is facing up (doesn't make sense to illuminate the inside of your monome - although it would be more minimal) and with the cathode or ground of the RGB LED connected to ground. The picture below shows how they should go in. The longest leg goes into the second hole over if the board's oriented so you can read the text the right way up. On the underside the longest leg should go back to GND (ground) the circuit is highlighted in the picture on the right.
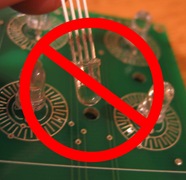
Definitely not like this:
You need a small bit of force to push the LED in place (you need a lot more if you do it the wrong way). There are little ridges on the LED legs which will sort of slide into place when it's in properly. The LEDs shouldn't fall out if you turn the board over. You can put the button-pads over the LEDs and push each of them to make sure none of the LEDs are sticking up too much.
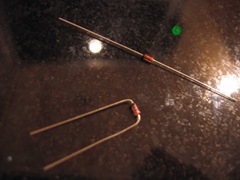
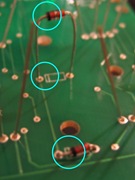
The diodes then go in on the underside of the board (the opposite side to the LEDs) so the top side of the board is nice and flush for the button pad. I bent the diode first (see the pic), slid it in then bent the legs to hold it in place. It's really important to ensure they are orientated the correct way (the stripe has to match the stripe on the PCB).
Next the solder - the PCB holes are tiny and really close so it's difficult to get the solder to connect to just one of the little buggers. If you're totally new to soldering, it'd make sense to practice on a cheaper project first. A really precise soldering iron helps and one that's temperature controlled would be really handy as well. I found a de-solder pump really good for fixing mistakes.
Some basic tips:
- Apply heat to the part you're soldering, not the solder itself - otherwise you end up trying to drip the solder in place
- Don't apply too much solder - it should connect all around the hole with a little raised area sticking to the leg
- Use a damp sponge to clean the iron tip when it gets clogged
- Don't leave the iron on too long - the solder will boil and spit
I never really knew what the difference between a cheap soldering iron and a temperature controlled one was, I just presumed it was a pro thing until I saw a bit of solder boil on contact with the iron and spit everywhere. A sensible reaction would be to close your eyes or look away, I, however, widened my eyes in surprise.
So if you have a temperature controlled soldering iron or you don't have inappropriate reactions to dangerous scenarios - read on! Otherwise, I feel your pain.
If you're confident enough in your work, snip all the legs - if not give it a quick test first (next post). Personally I find it easier to fix something if the legs aren't snipped.
No comments:
Post a Comment